Getting Started with iKeepm
Our Welcome page will help you set up your account and learn about the iKeepm workflow. You’ll be brought to the Welcome page right after you sign up for your iKeepm account. Keep in mind, the layout of iKeepm will vary depending on your browser size and if you're using iKeepm on a desktop versus mobile device. Therefore, the screenshots you see are based on a desktop browser using Google Chrome.

The best thing about iKeepm is that it gets out of your way. We don't restrict how you work within the application. Some folks may just want to populate their inventory with all their items. Power users who want full control will want to have all categories and rooms set up for their items.
However, our recommendation is that you populate all the necessary rooms and categories prior to entering your items into your inventory.
Let's start a mini tutorial shall we?
Create a room
First, let's start off by adding a room where the item belongs. We've created a room called "Unassigned" where items with no set location can be assigned to. Please note, this room cannot be deleted. However, you are free to create as many rooms as you wish!
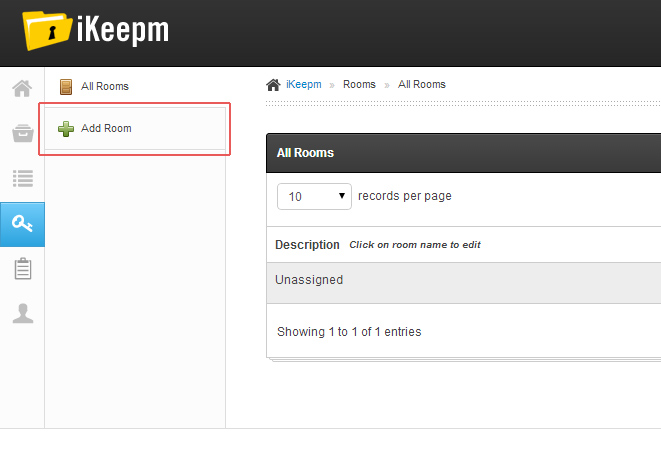
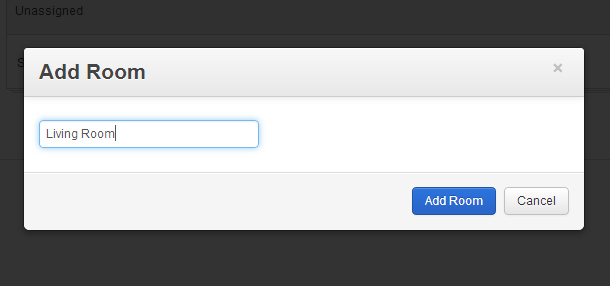
Enter the room name in the popup box that appears. The room name is not case sensitive, therefore you cannot have duplicate room names. Click save when you're done, you'll be redirected to the room.
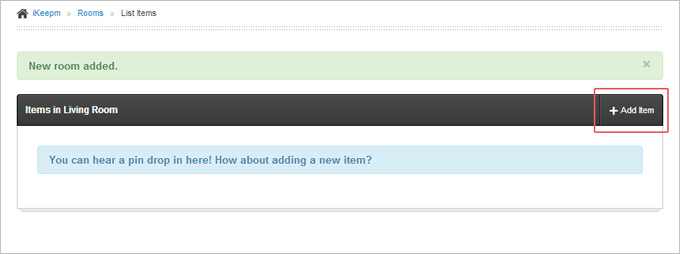
Remember, at this point you can choose to enter items for this room or continue creating additional rooms. For the sake of this tutorial, we're going to add an item.
To add an item to this room, click on the "Add Item" link in the title bar or from the menu on the left side of the screen (not shown in screenshot).
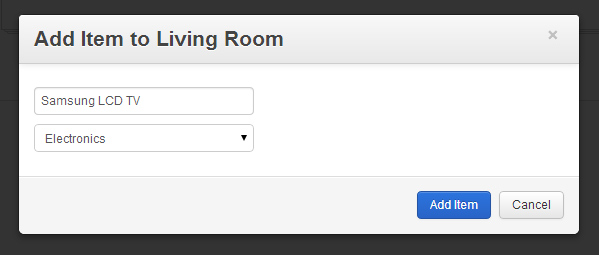
Enter the item description and category it belongs to. Note, the categories listed in the dropdown box has been populated for convenience. You can add or remove them with the exception of the "General" category. Like the "Unassigned" room, the "General" category is used for items that can't be specifically categorized.
Let's just assume the category you need is already listed. You can always modify it after the fact. Click the "Add Item" button and you'll be redirected to the item's detailed page.
On this screen, you can add additional information for the item.
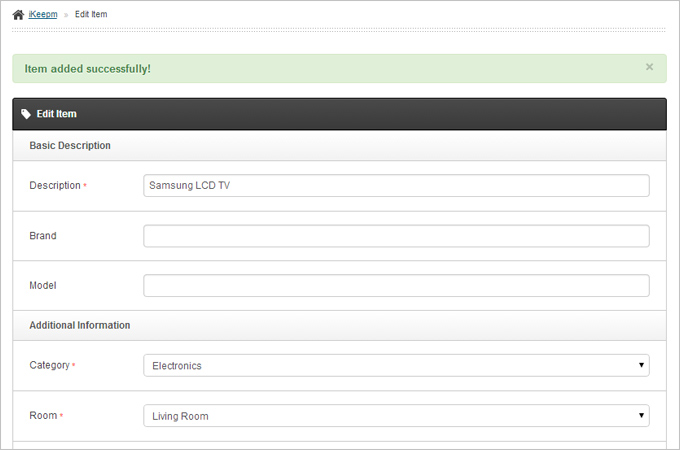
Congratulations, you've successfully added your first item into your inventory. Remember to personalize your inventory by adding and/or deleting categories and rooms as you see fit. Also, don't forget those documents! iKeepm accepts standard documents such as Microsoft Word, PDFs, text files and photos.
Still need help? Contact us at [email protected]